Acknowledgement
We would like to send our sincere thanks to Lithophane Maker, who made great contributions to the lithophane printing groups. It has never been easier to create stunning color lithophanes that will leave a lasting impression with their amazing image-to-stl generator.
Quick Walkthrough
#1 Get your printer ready
#2 Generate STL files and print
1. Upload your favourite JPG image to Lithophane Maker and configure
2. Create STL files and download
3. Set up in Bambu Studio and slice
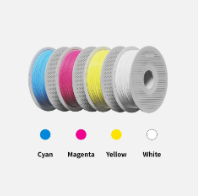
4. Load filaments into corresponding AMS slot and print!
For a step-by-step guide, check out the CMYK Lithophane Printing Guide.
Printing Tips
•Smaller nozzle sizes and lower layer heights are essential to achieve better printing results. We suggest using 0.2mm or 0.4mm nozzle sizes and layer heights between 0.08mm and 0.12mm. Check CMYK Lithophane Printing Guide on Wiki.
• Due to the limitations of printing layers and resolution, there may be some color deviation between the actual image and the lithophane prints.
• To prevent warping, the recommended heated bed temperature is between 45-50℃.